The purpose of this procedure is to give students and faculty access to files on the biology web server which you will want to do for all of your web pages. For students, the material on the Biology Server should be restricted to course material only. You can use the College-wide server for personal web pages (see ITS).
You can work on any computer (PC or Mac) and then load your new or modified files into your folder. Every 1 minute, the server updates any changes made to its files so the longest you would have to wait is 1 minute to see your new files.
You will need to launch the program that allows you to FTP (transfer) your file from your computer to the Biology Server. For Macintosh, this is the program called Fetch.
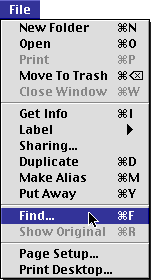
To find the program Fetch, go to the finder (i.e. click on the
desktop) and start a search on your hard drive by selecting Find...
under the File menu.

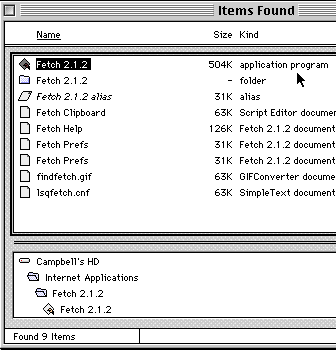
You will see a dialog box like this:

Type in the word fetch and click on the find button. You will see all of the files and programs that have the letters F-E-T-C-H in their names. Locate the one that is an application and double click on it.
Now you are ready to Fetch a file. This means that you can either deposit a file onto the server, or retrieve one from the server so you can modify it. You can only access files that are in your folder and your folder is password protected.
You will see a dialog box similar to this:
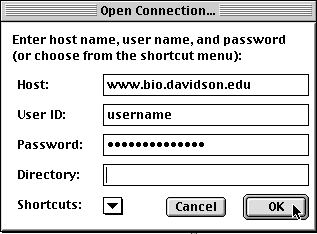
However, the host will have a Dartmouth Host listed. Change this as you see above with your username and password. If you do not know your password, contact the web master. Click on OK.
You will see something like this, which is a list of all the contents of your root folder.
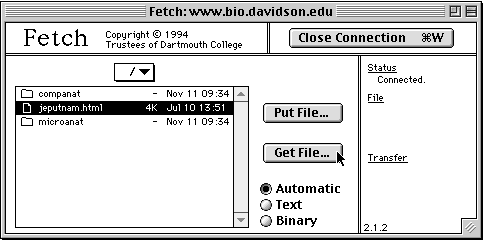
In this case, we are seeing all the contents of Jerry's folder.
If you wanted to retrieve the file called jeputnam.html (which is Jerry's CV), all you would have to do is click on the file so that it is highlighted in black and click on the Get File... button. When you do this, you will get the opportunity to save the file.
Once you have an HTML file you want to put on the server, use Fetch to put the file onto the server. Click on the Put File... button and you will get the chance to click around on your hard drive until you see the file you want.
If you want to put a new folder on the server, you can do this by going to the Remote menu and selecting Put Folders and Files...
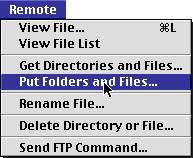
When you do this, you will get to click on the files and folders you want to transfer to the server so that they are highlighted in black. Then click on the add button.
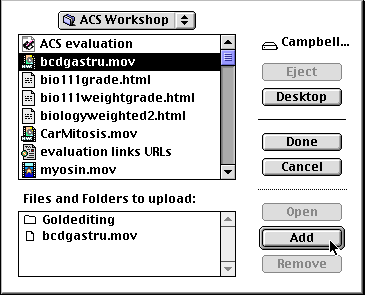
When you have selected all the files and folders you wanted to transfer, click on the Done button. In the figure above, I am transferring a folder called Goldediting and all of its contents, and a file called bcdgastru.mov. You will get a dialog box that asks you how to send the files. Take the default options and click OK. Everything will be transferred to the server ready to be viewed by the world.
Learn How to Make Relative Links
Davidson College Biology Department
© Copyright 2004 Department of Biology, Davidson College,
Davidson, NC 28035
Send comments, questions, and suggestions to: macampbell@davidson.edu